
|
|
|
|
|
|
|
Angle Calculator™
How to use: The Finisher
MC= Miter cut angle, P=Plumb cut angle, W=Whole angle, S=Seat
cut angle & R=Right angle
|
|
|
- How to find Compound
Miter
Angles for Crown Molding:
First determine which type of
crown molding you're working with, 52/38°
(on 52/38°
molding the ceiling contact surface is 38°
and the wall side is 52°)
or 45°
(on 45°
molding the contact surfaces are both 45°)
|
|
|

|
- There are two different charts on this tool, one for each type
of crown molding. The chart on the Miter
Angle side reads for 45° crown molding and the chart
on the Whole Angle side reads for 52/38°.
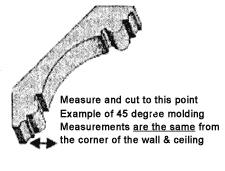
|
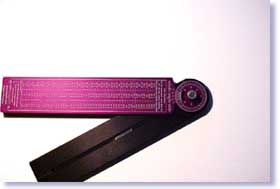
- Open the tool and fit into, or around the outside of the
surfaces being checked.
|
- Read the dial on the Miter Angel side of the tool, using the
correct chart for your material, scroll down the left column to
find the wall miter angle that
you found on the dial, now read across to the right. The center
column reads saw bevel (blade/tilt) and the right column reads saw
miter.
|
- When measuring and marking the crown molding for length, mark
the bottom edge that will set against the wall, lay the crown
molding flat on the saw. Set your saw to these settings for
perfect compound miter cuts.
|
|
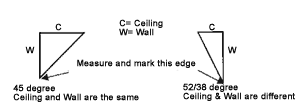
|
|
Example on the 45-degree side of the tool, a 90-degree
corner will show 45-degree wall angle in the left column, center
column saw bevel is 30 degrees, and saw miter is 35.3 degrees. These
angles are the same for an inside or an outside corner; the only
difference is the direction of the cut, long point for inside cuts, or
short point for outside corners. |
|
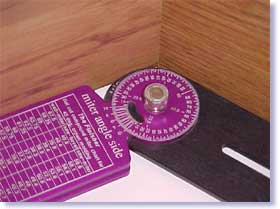
|
|
- How to find Miter Angles:
Open tool and fit into,
or around the outside of the surfaces being checked.
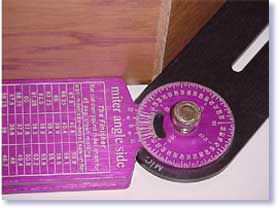
Read the dial on the side of the tool marked (miter
angle side), with index mark, marked with M set
the saw to that angle, and make your cuts.
|
|
|
|
|
|
|
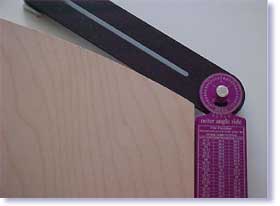
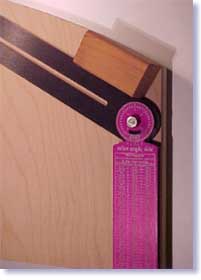
- How to find Miter
Angles on an Elliptical Arch:
On an elliptical arch, be sure that at least the first
several inches of the tool, closest to the miter
intersection, are touching the surfaces being checked.
Depending on how tight the arch is, you may need to use
a small block to hold the tool out enough to fit the
area.
|
|
|
|
|
|
|
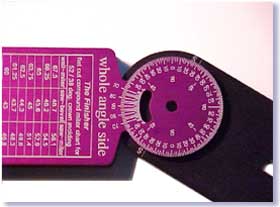
- How to find Whole Angles:
Open the tool and fit into, or around the outside of the
surfaces being checked. Read the dial on the side of the
tool marked (whole angle side) using the index mark,
marked with a P, this is the overall wall angle.
|
|
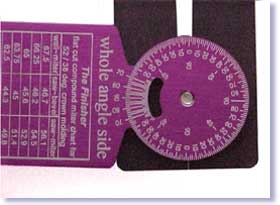
- How to find Right Angles:
Open the tool and fit into, or around the outside of the
surfaces being checked. Read the dial on the side of the
tool marked (whole angle side) using the index mark,
marked with an S, this is the right angle to the
wall angle.
|
|
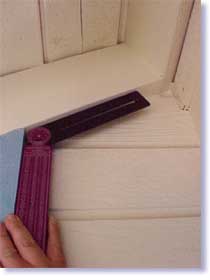
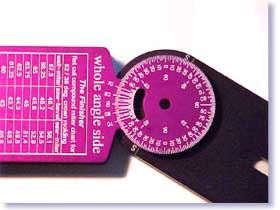
- How to find roof rafter Plumb
Angles:
Open the tool and fit into, or around the outside of the
surfaces being checked. Read the dial on the side of the
tool marked (whole angle side) using the index mark,
marked with a P, this is the plumb cut angle for
the roof rafters of this angle.
|
|
|
|
|
|
|
- How to find roof rafter Seat
Angles:
Open the tool and fit into, or around the outside of the
surfaces being checked. Read the dial on the side of the
tool marked (whole angle side) using the index mark,
marked with an S, this is the seat angle for roof
rafters of this angle.
|
|
|
|
|
|
|
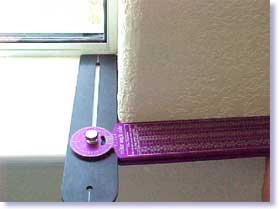
- How to check wall angles for
shallow areas like window stools:
Use the slotted end of the blade, adjust the blade to
fit the area, tighten thumbscrew and mark the material,
or to read this degree, transfer a mark onto scrap
material. Loosen the thumbscrew and slide blade to pivot
around the square end of the blade, then using the index
mark, read the degree.
|
|
|
 |
|
|
|
When
Re-Installing the Inner Blade:
Be sure to re-install the inner blade so that the index mark,
marked with an M is seen on the miter angle side of the
tool, and the P & S index marks are read on
the whole angle side of the tool. |
|
|
|
|
|
|


